Prolyncs offers businesses to have their own customer page that they can use to interact with customers with great level of customization, and also offer SEO (Search Engine Optimization) features for the page to show up on search engine result page driving attention and exposure to the business.
Here's how to set up your main page:
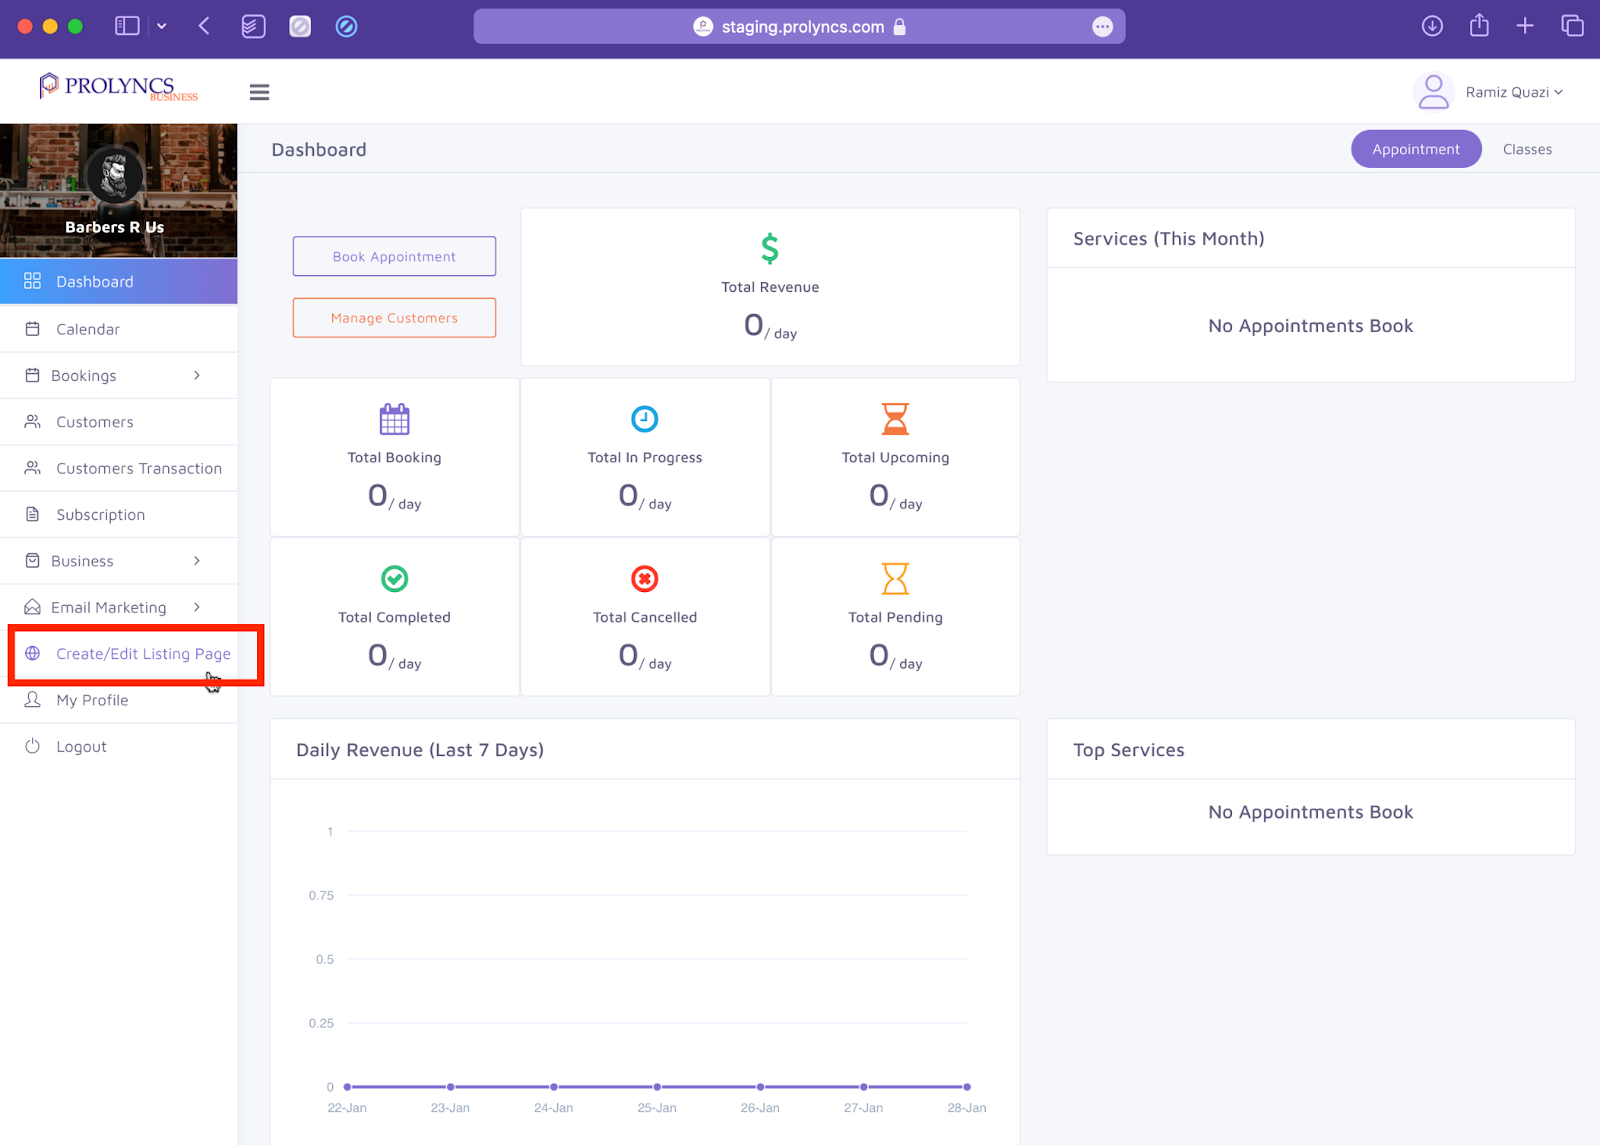
Step 1: From the main dashboard, go the sidebar > click on “Create/Edit Listing Page”
Step 2: You can now see the edit section for your business’s page, we would be discussing each of the sections in details later
Step 3: The first section is Header. This section will be displayed on the left side of the header of the page, add the desired text content in the “Header Name” text field.
Step 4: The next section is “Photo and Text”. This section will contain the profile photo, the cover photo, and the listing or title name of the business. This will be displayed just below the header.
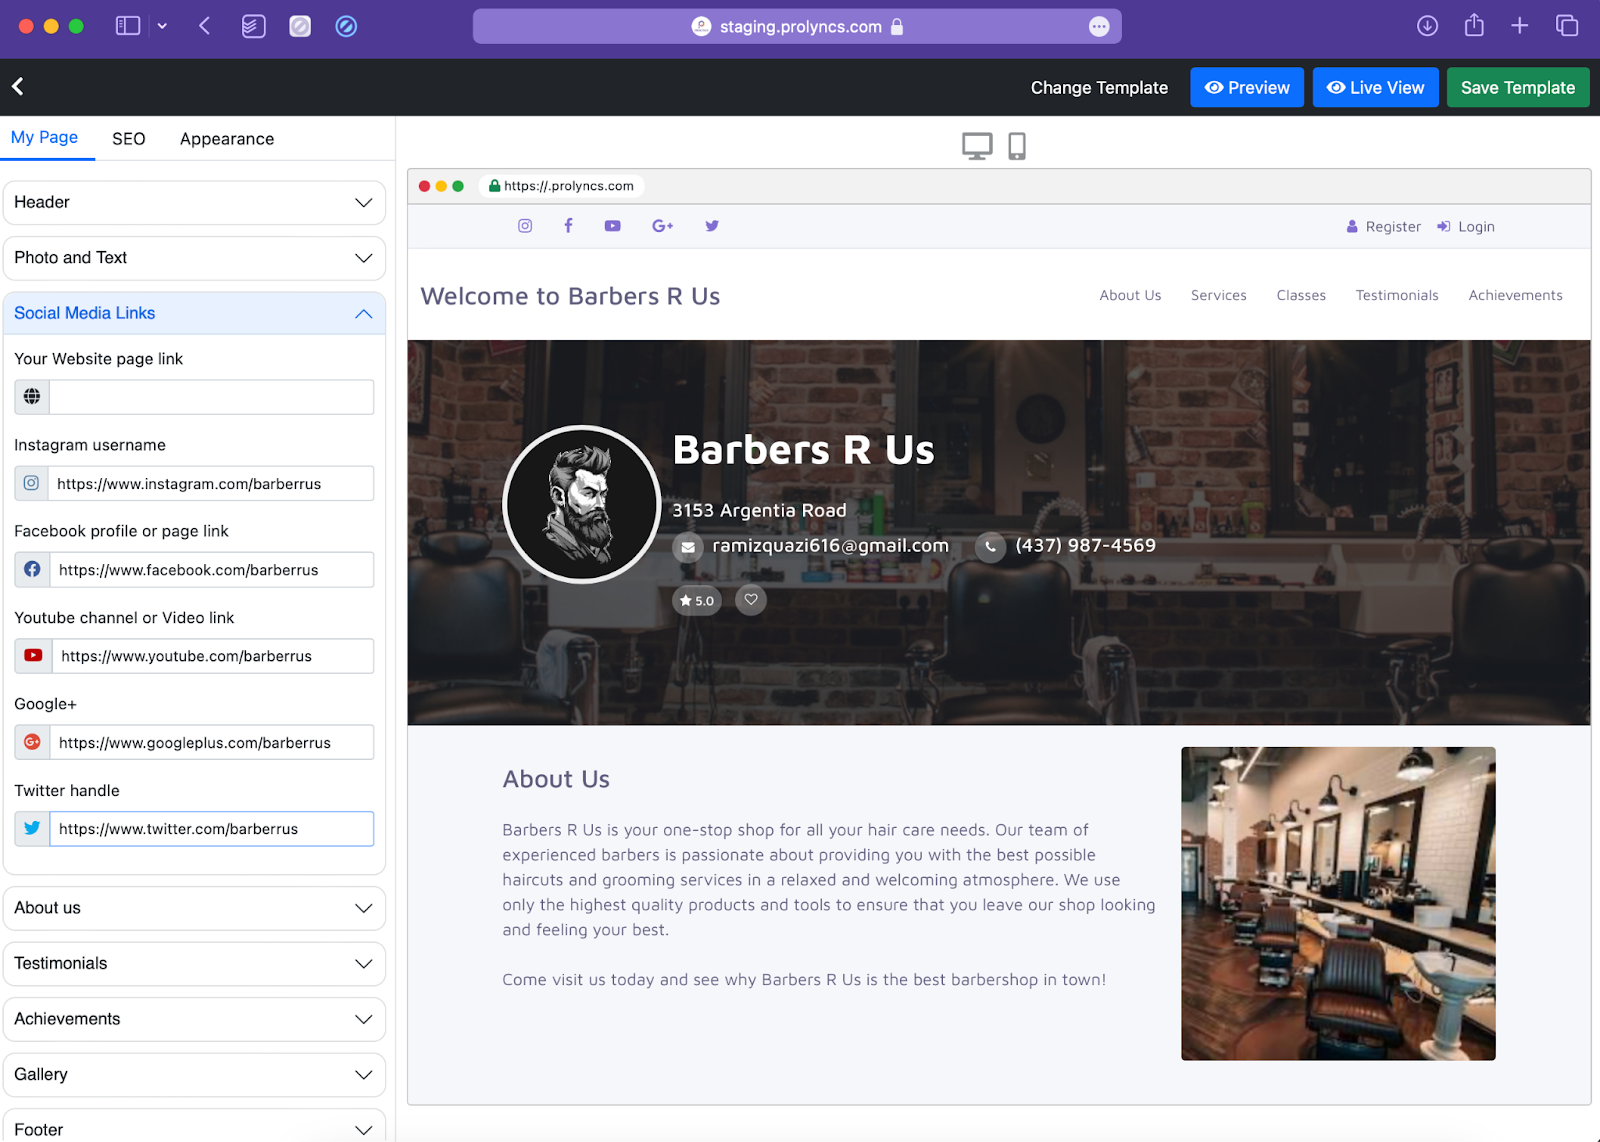
Step 5: The next section is for social media links. From this section you can add links to social media that the business is active/discovered upon. This section will be displayed above the header with icons as link to websites.
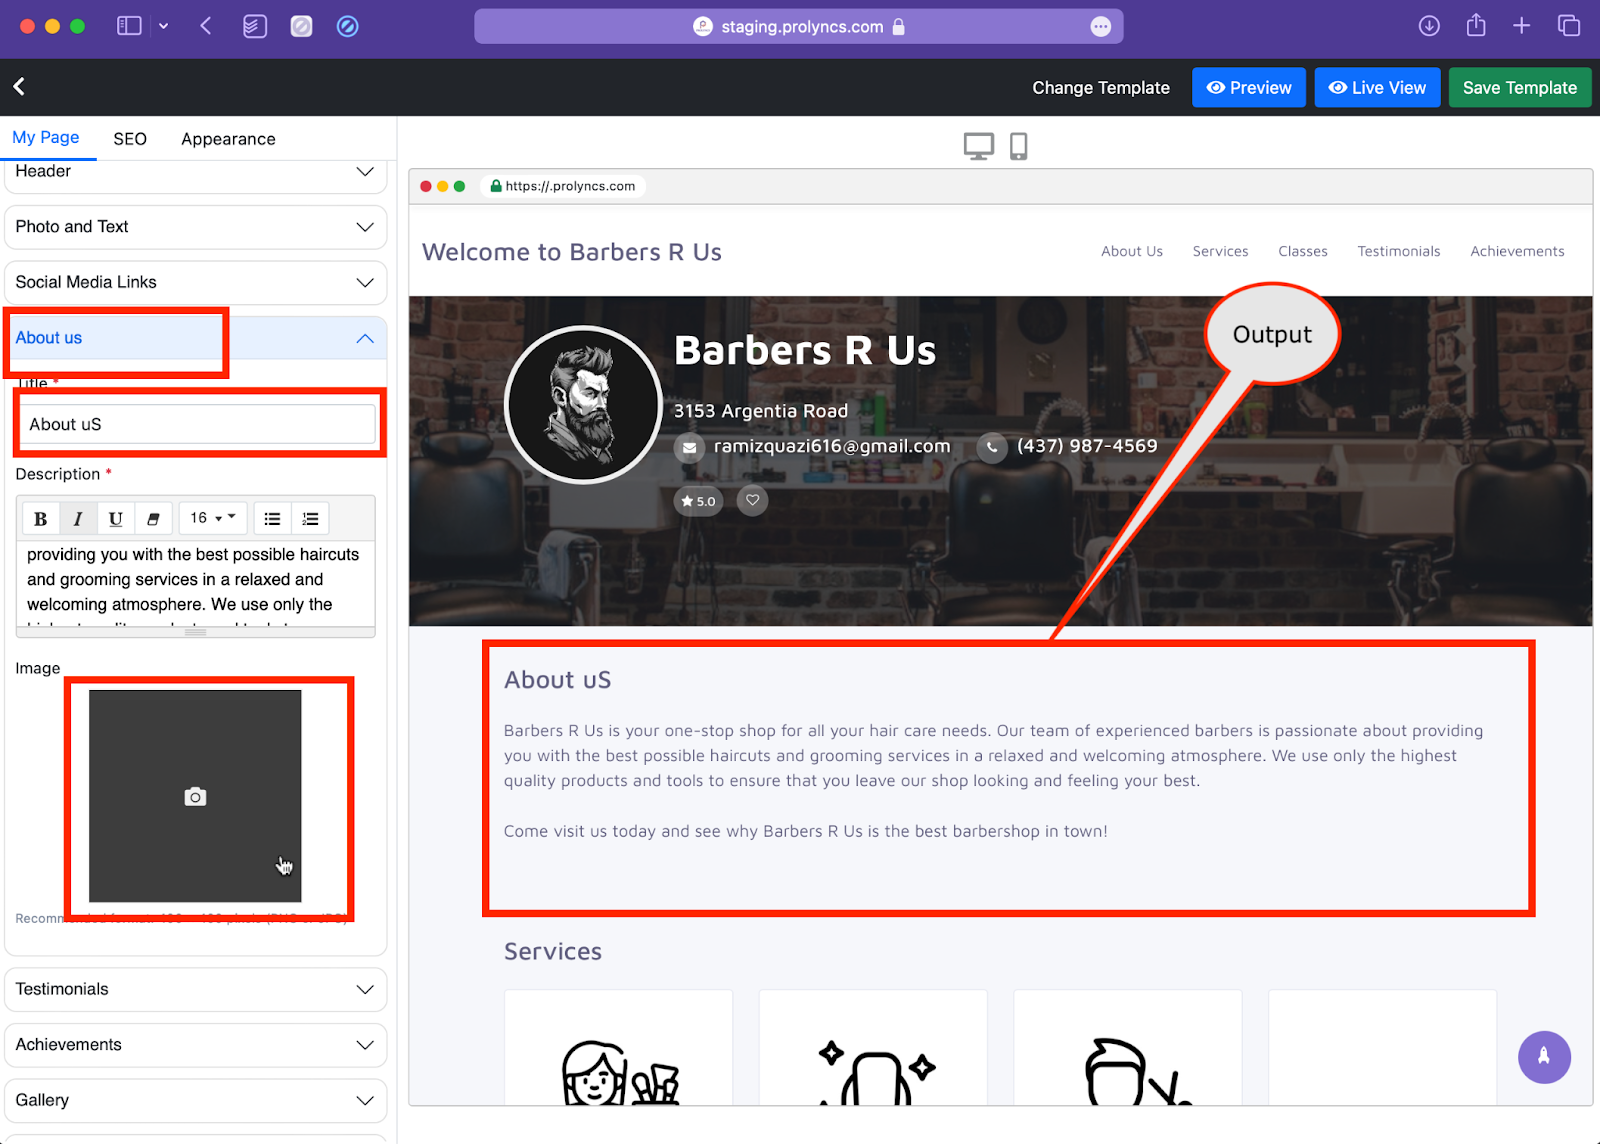
Step 6: The next section is the Description. This contains all the necessary introductory information about the business. It can contain a title, a description, and an image as well. This section will be displayed below the cover.
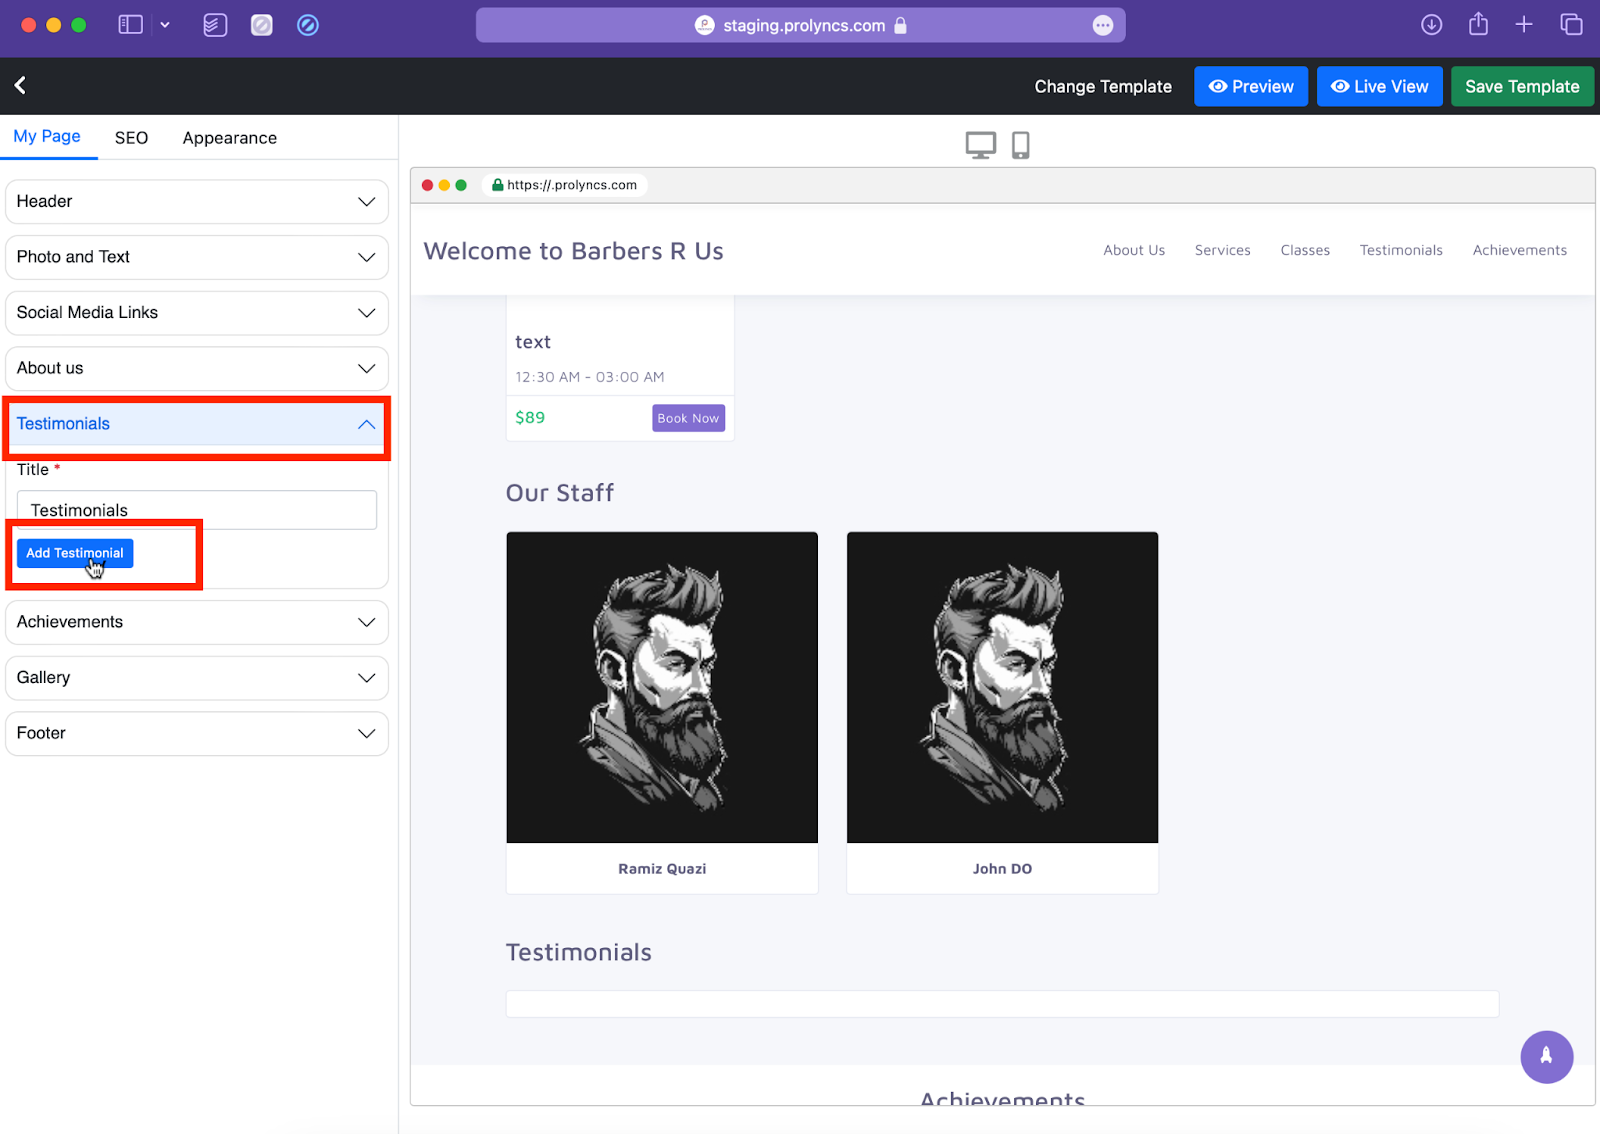
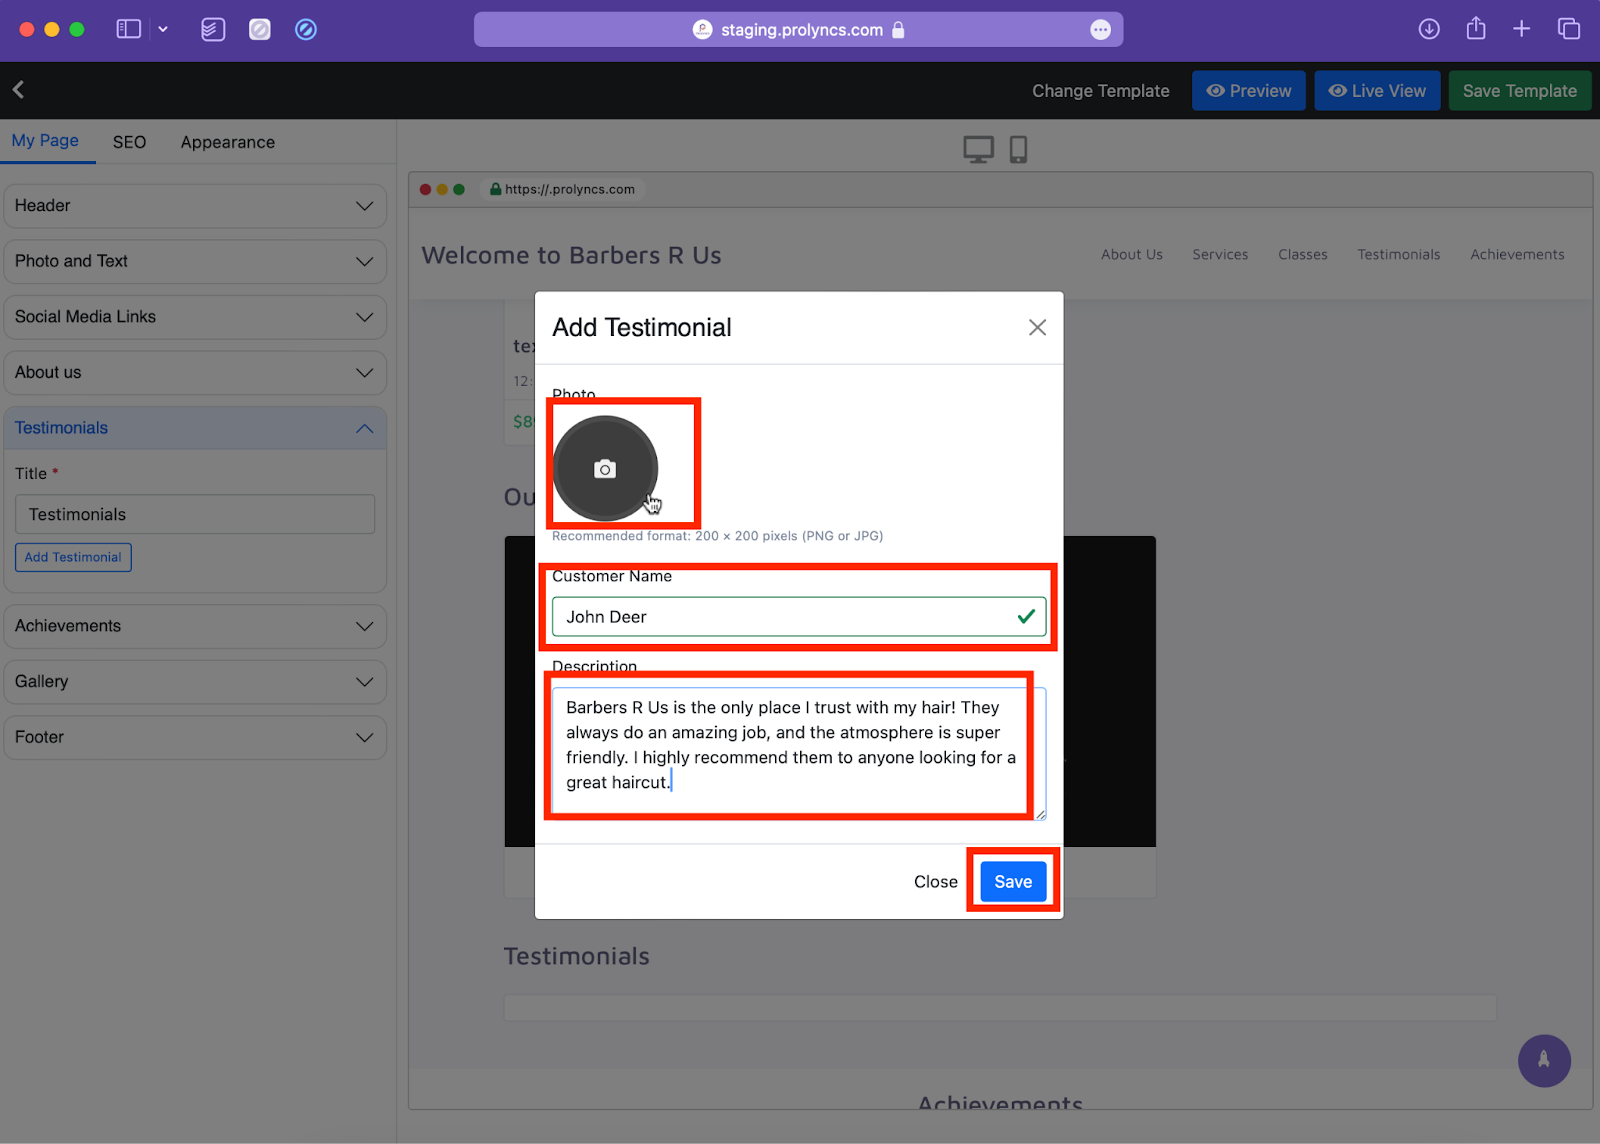
Step 7: The next section is Testimonials. This section displays the customer testimonials provided by the customer. Testimonials can help boost the credibility of the business and its services. To add an testimonial, click on “Add Testimonial”.
Step 8: Enter the name, photo and the description for the testimonial, then click “Save”
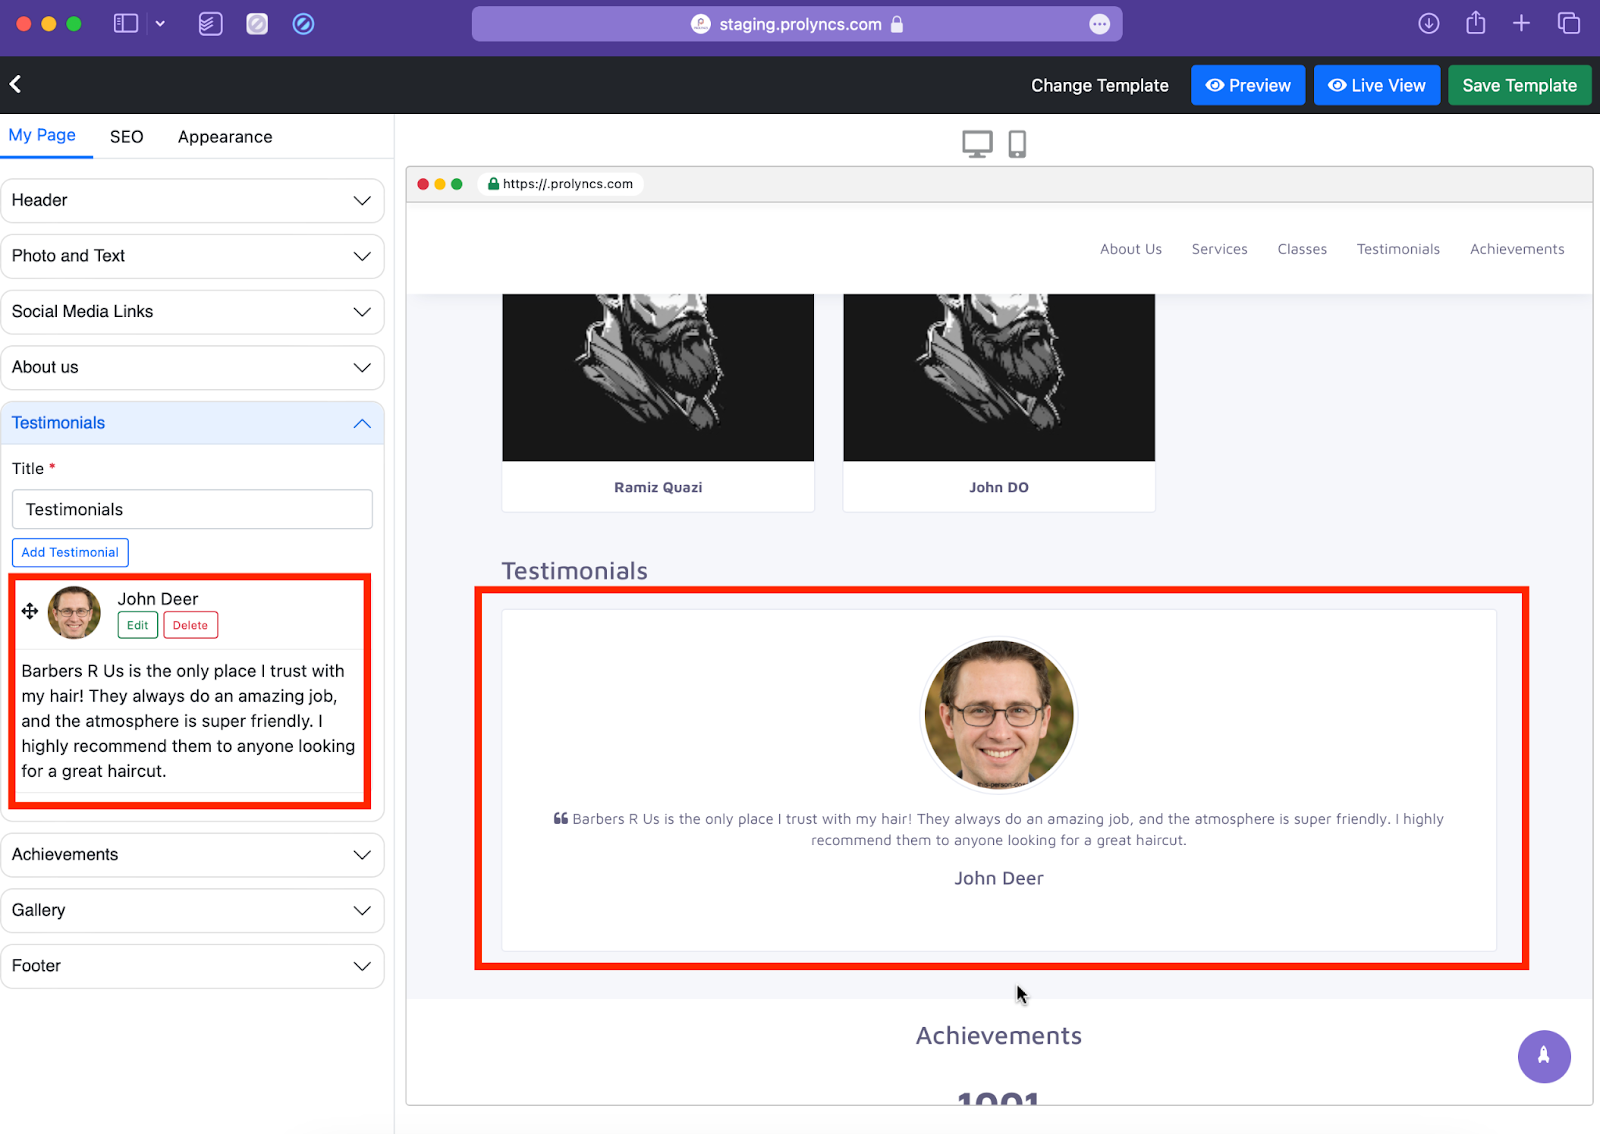
Step 9: The testimonial has now been added, and can be seen in the preview, the testimonial can also be edited/deleted from the right side of the screen using the “Edit” and “Delete” button. You can also set the arrangement of the testimonial by using the move button next to the testimonial.
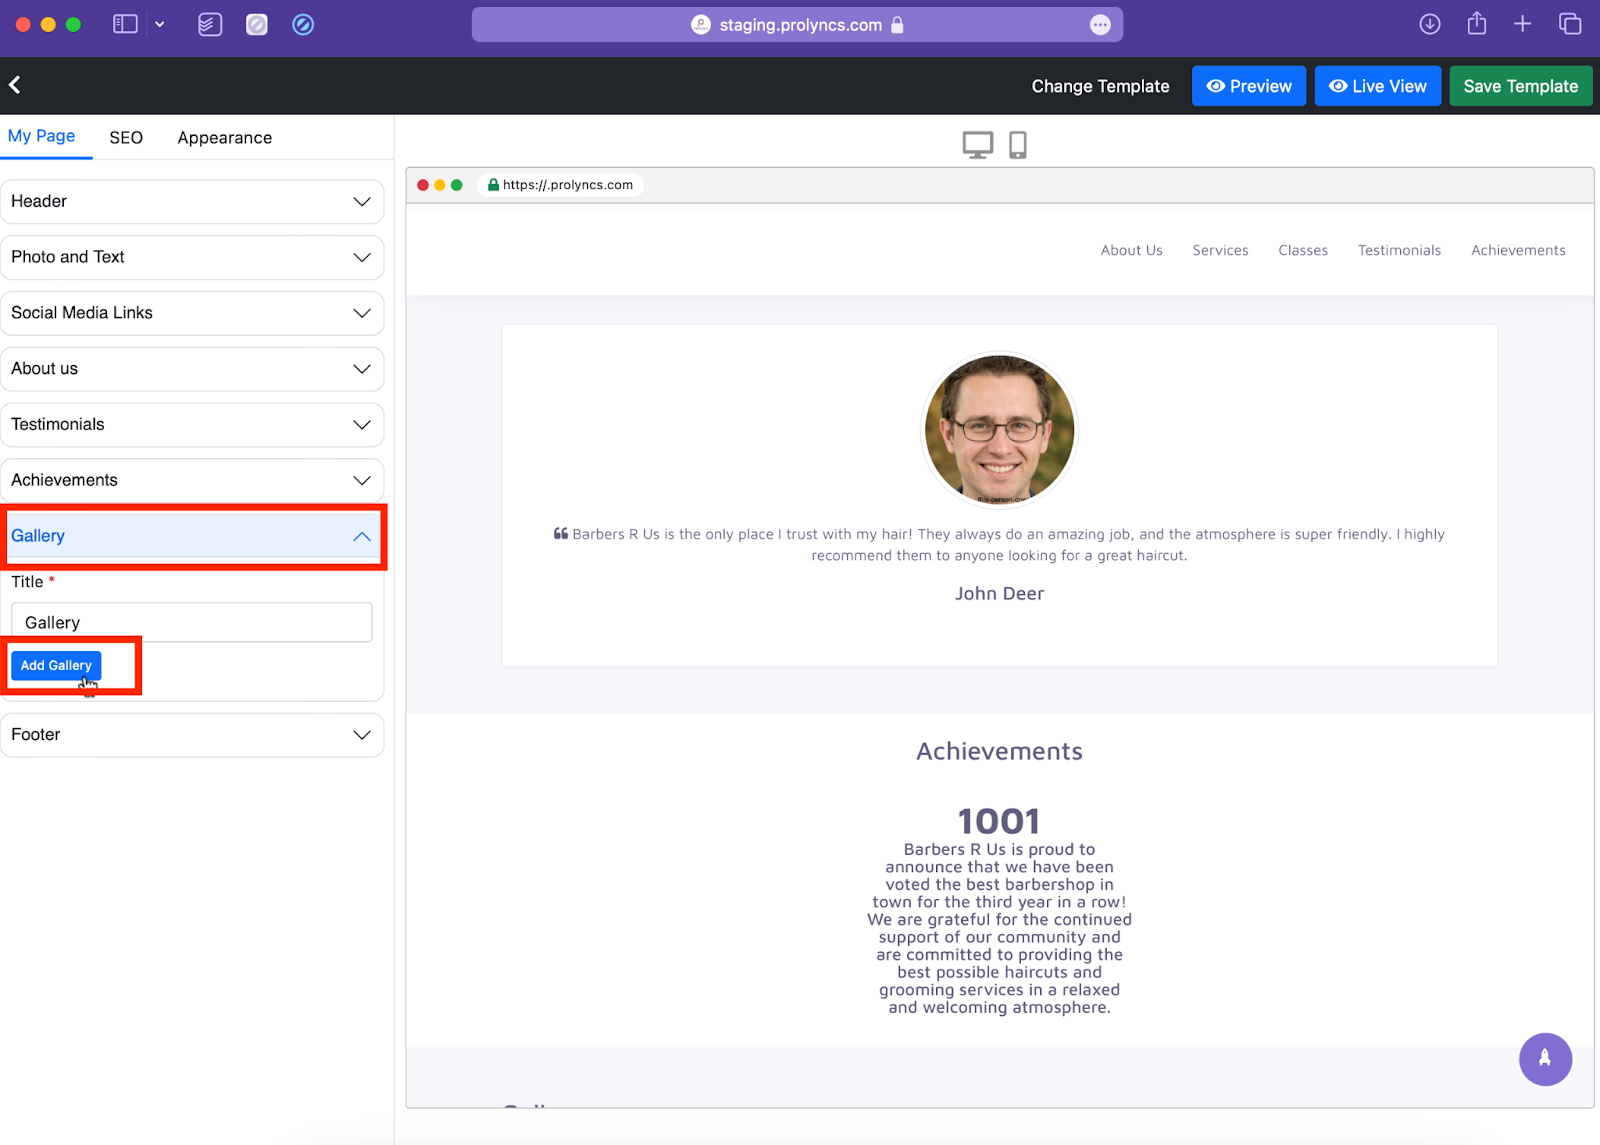
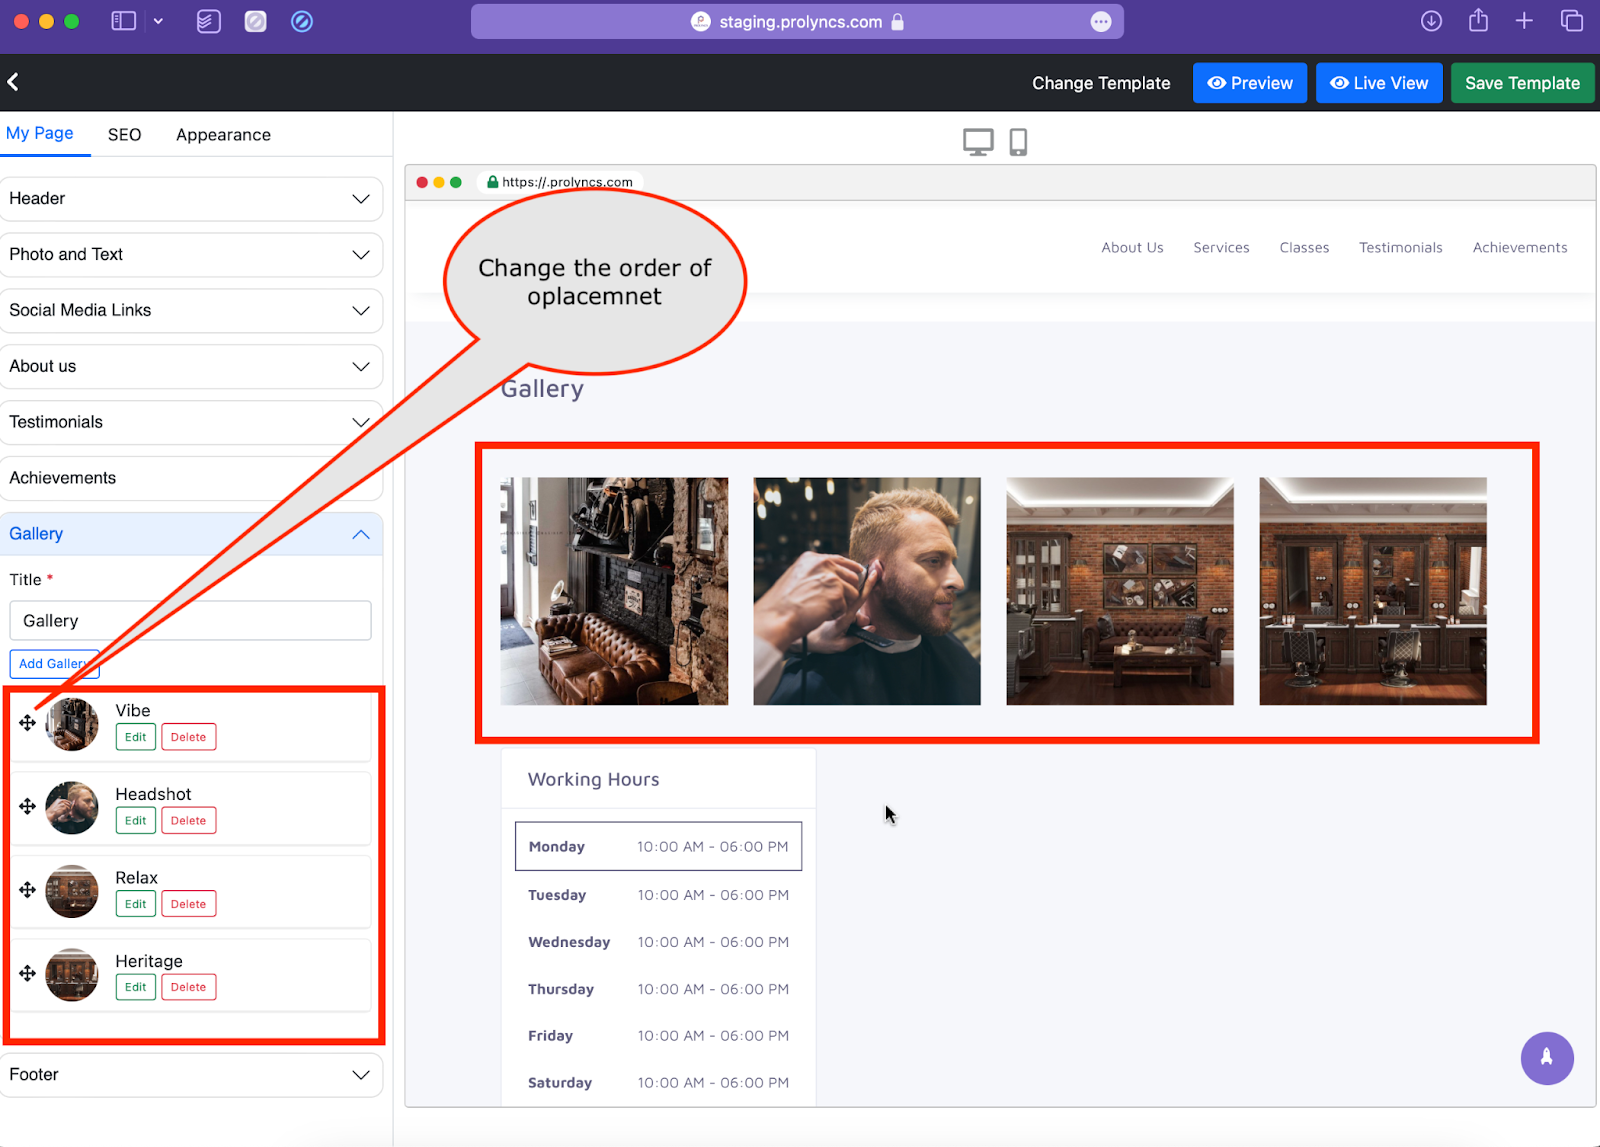
Step 10: The next section is gallery, it would be used to display images provide the by the business. Click on “Add gallery” button.
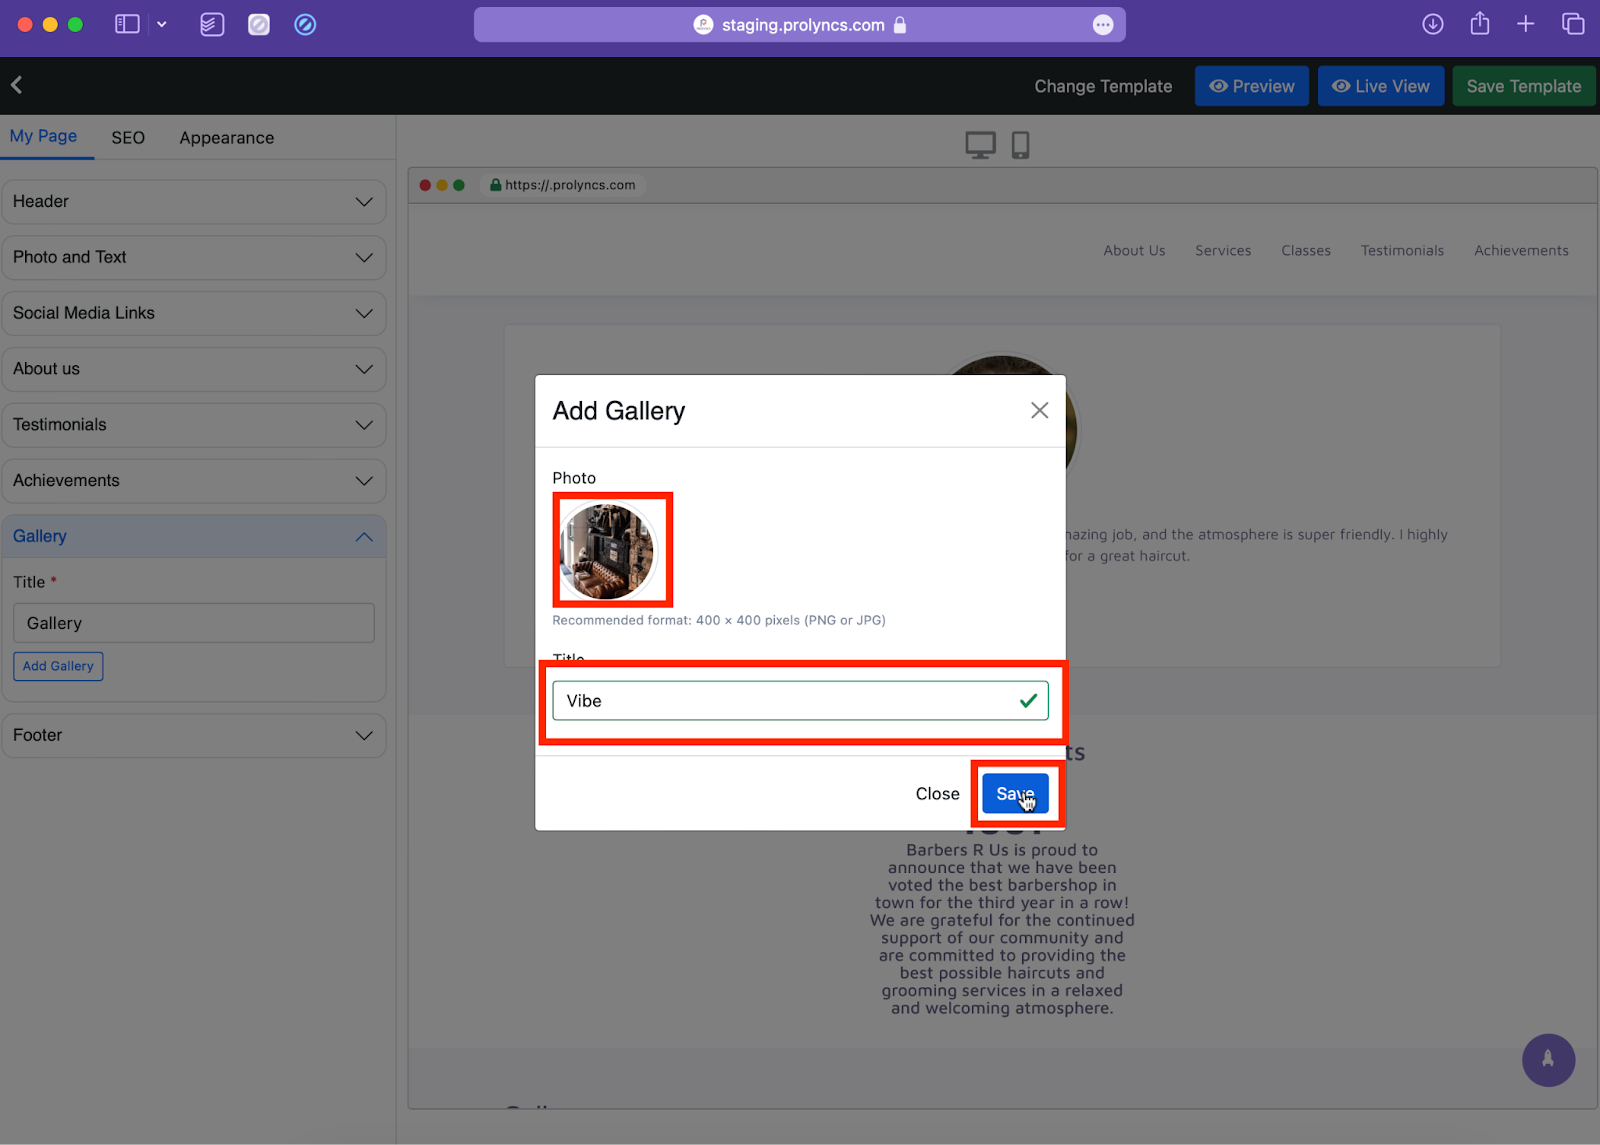
Step 11: Now add the image and title for the picture, click “Save”. Repeat the same steps for the number of pictures desired.
Step 12: All pictures are added to the gallery, to change the order of the images just click and drag using the move button.
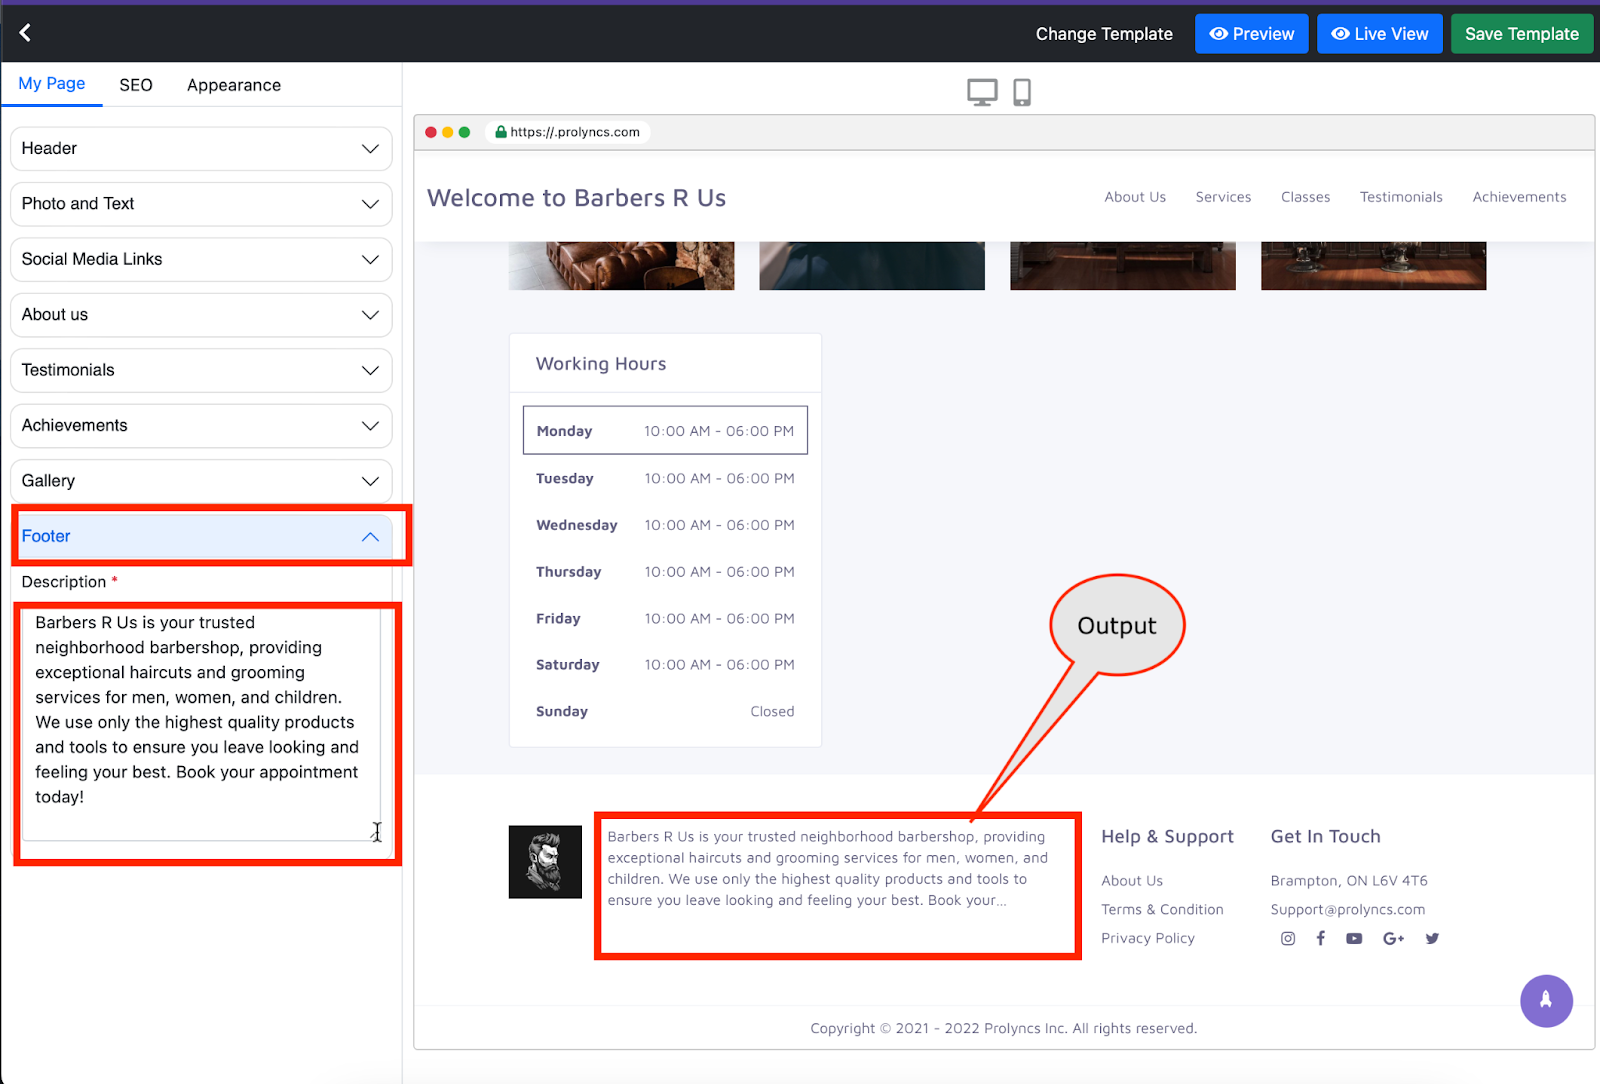
Step 13: The last section is the “Footer”, as the name implies it would be displayed in the footer region of the page
Step 14: The next part is optimization of the site for better results for a search engine. To go to the search engine optimization tab from the bar, click on the “SEO” tab, you can now add the desired details for the SEO sections.
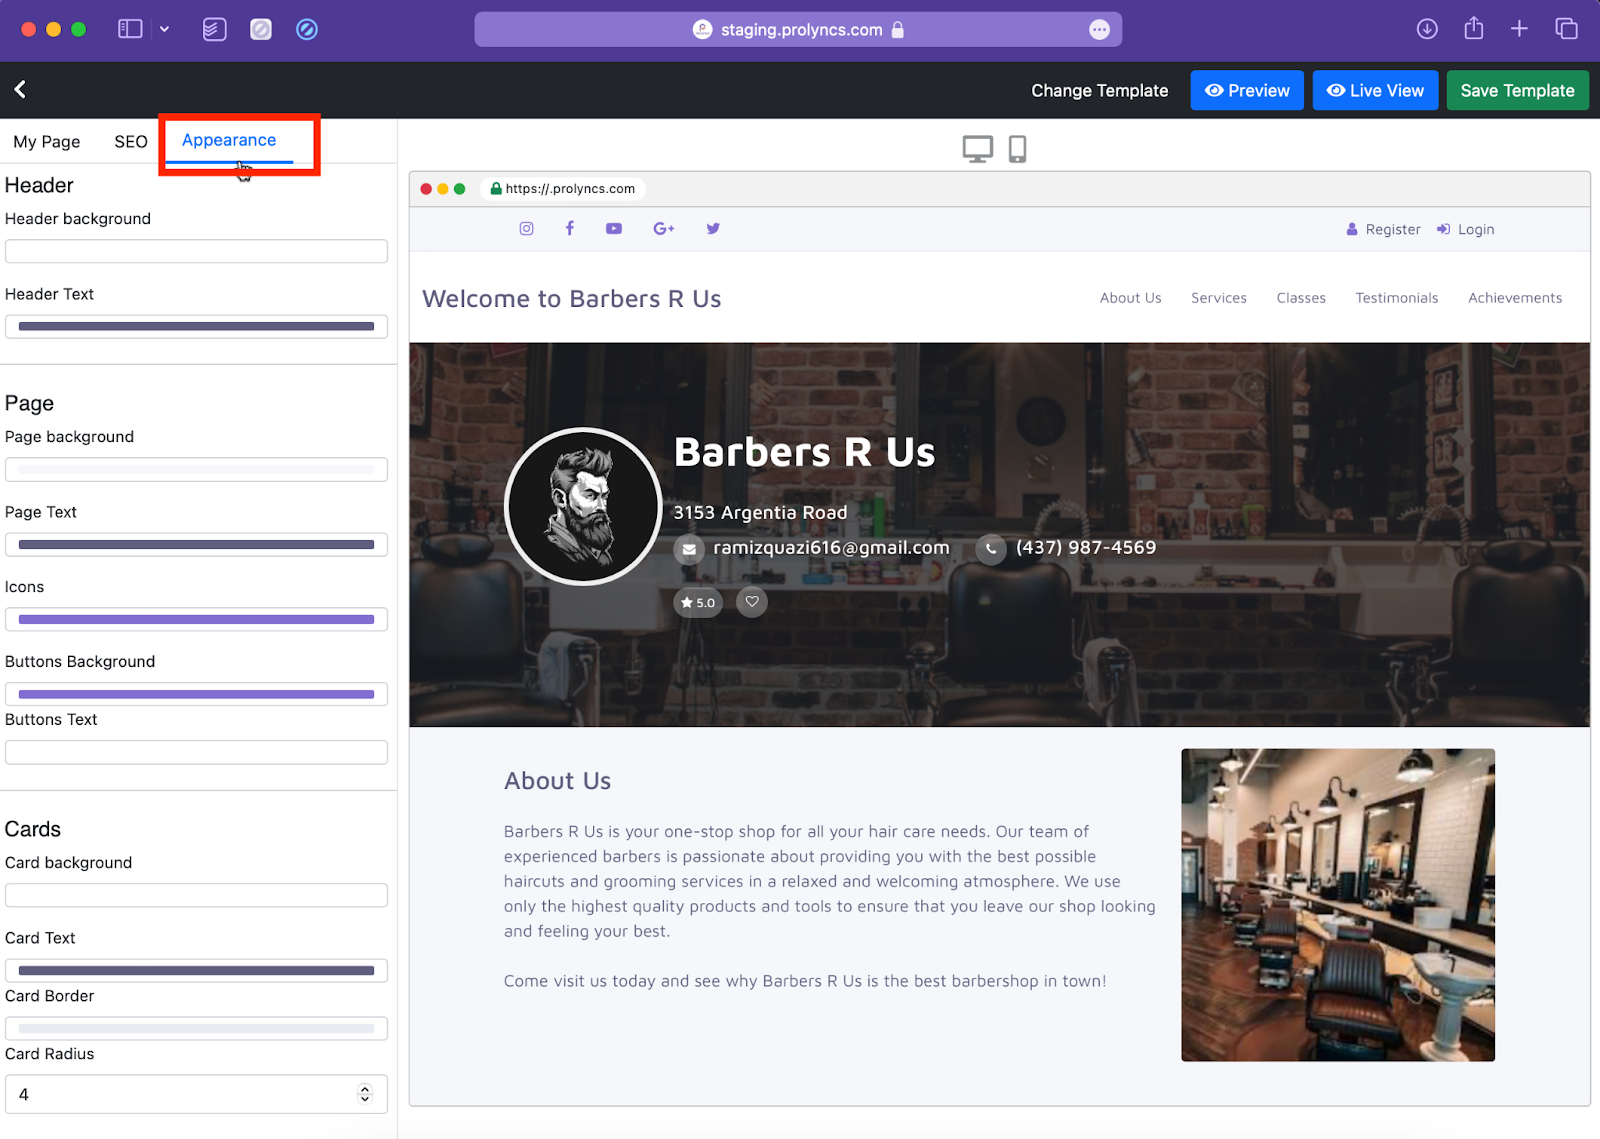
Step 15: You can also change the appearance of the page like change accent colours of certain types of components. Go to the “Appearance” tab, select the colours you would like to use.
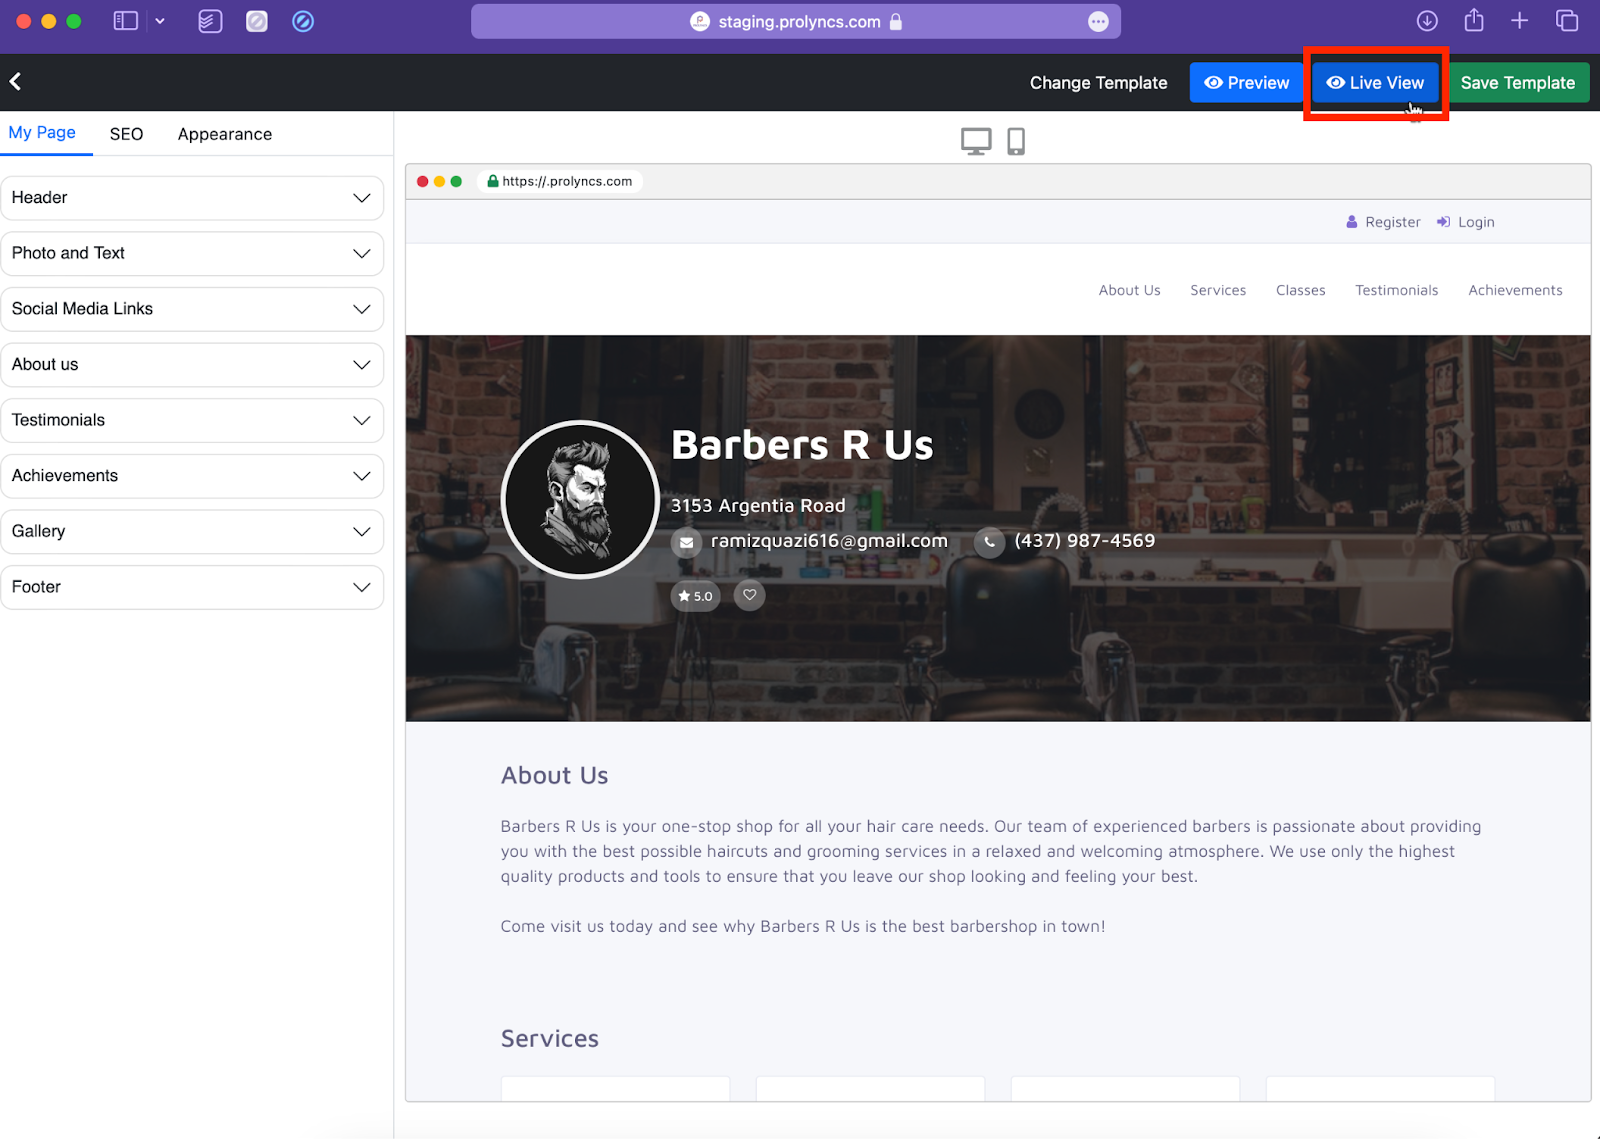
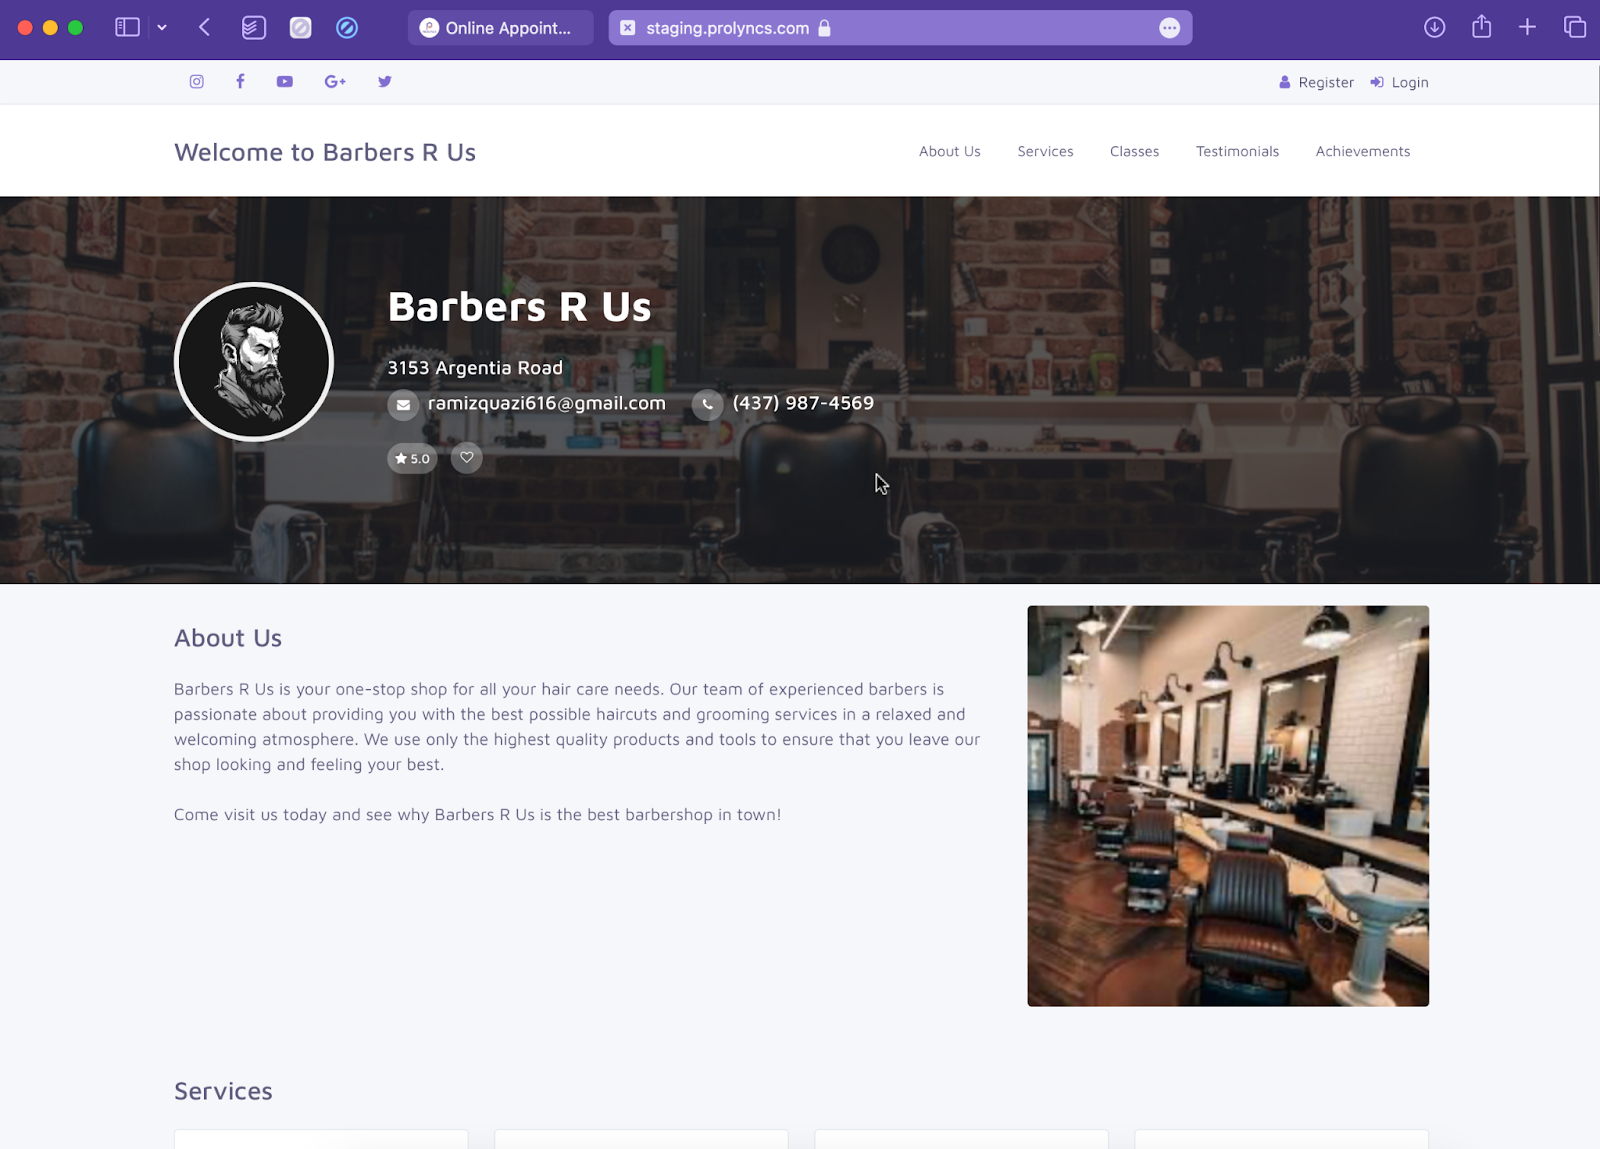
Step 16: Now we are all set with designing our page, to view how the page would look on the real website click on the “Live View” button from the top right of the page.
You can now see the how the page would look to the customers
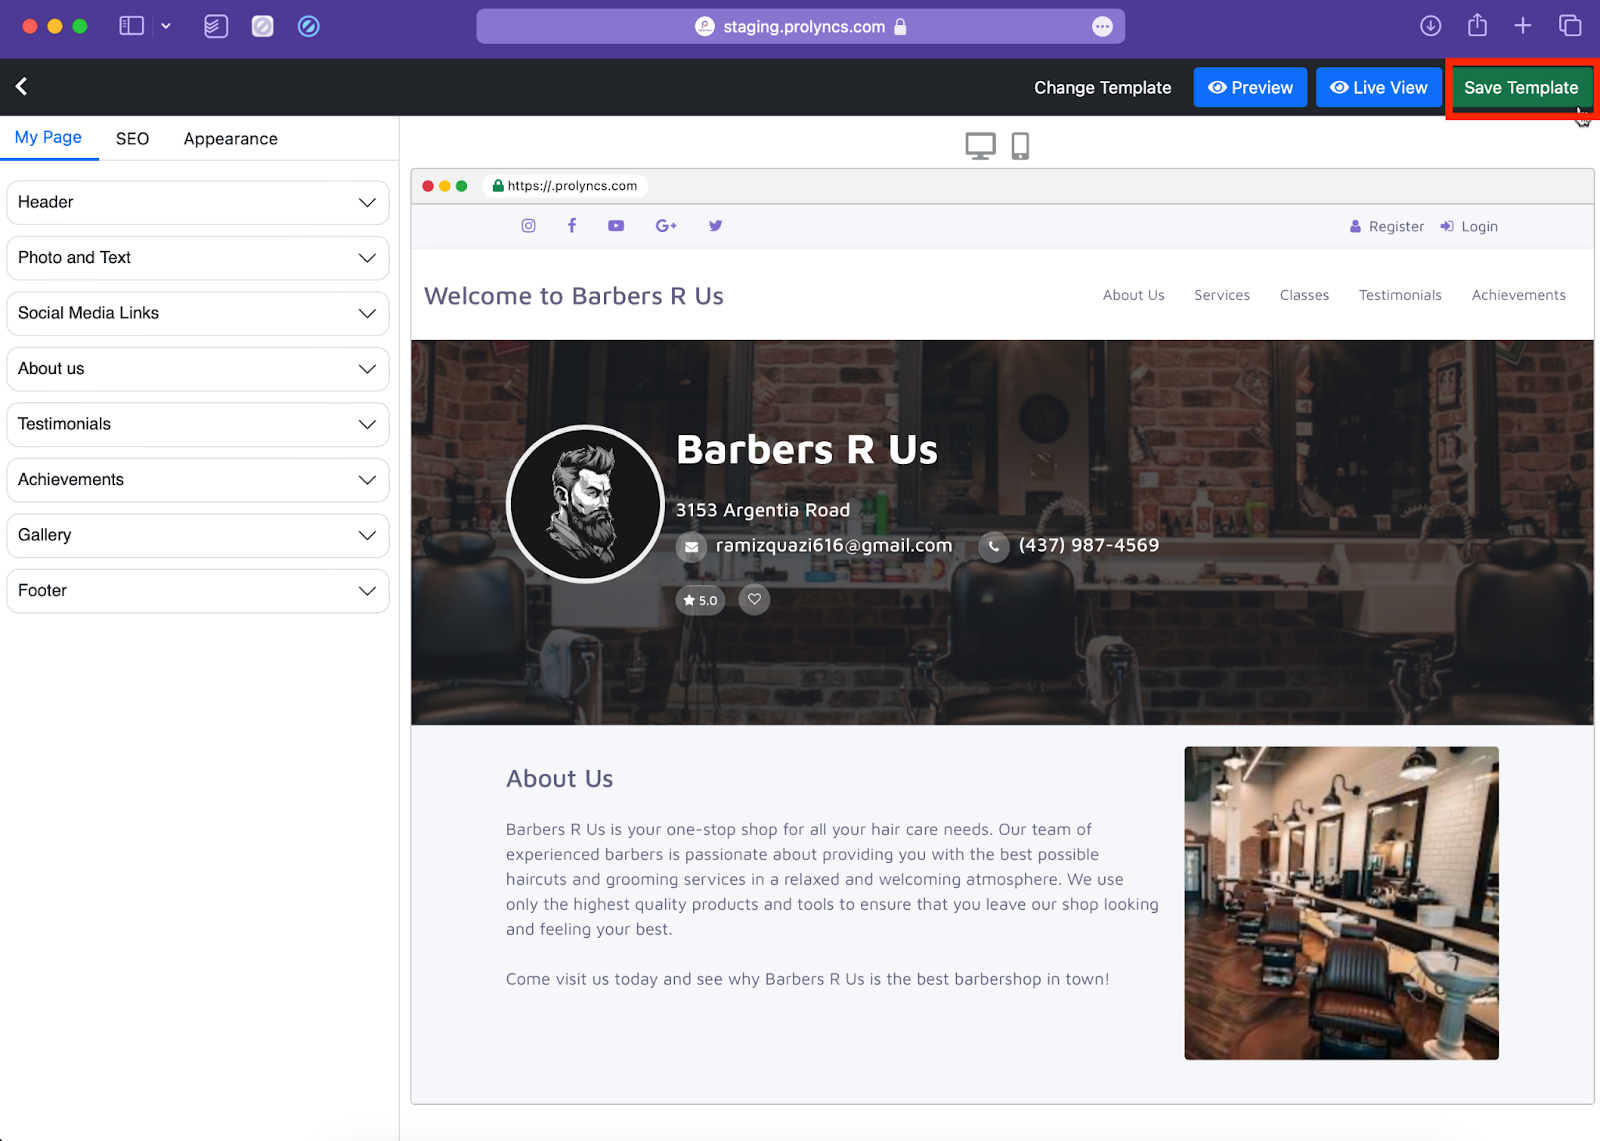
Now that everything looks good, let's go back to the edit page to save the page that we designed.
Step 17: After reaching the edit page again, click on “Save Template” to save the changes.
Your page has now been made and is ready to greet customer with an engaging presentation of your business.
Can I add more sections to the page? Prolyncs already offers a comprehensive list of sections for a business's page designed for ease of interaction and consistent experience for the user.
Can I change the profile and cover photo just for the page? Yes, profile and cover photo can just be changed for the page.
Can I import customer reviews directly though reviews? For the present moment, you have to manually add the customer testimonials.